16.10. Using BrushesIn the same way that imagesettile( ) allows you to use a picture for filling, imagesetbrush( ) allows you to use a picture for an outline. While this could be a premade picture you've just loaded, you can get nice effects by using handmade pictures that are swept around basic shapes. Figure 16-14 shows a picture of a lot of dots ranging in color from red to yellownot very interesting, but great for using as a brush. Figure 16-14. The picture we'll be using as our brush
Those dots were created with this script:
    $brush = imagecreate(100,100);

    $brushtrans = imagecolorallocate($brush, 0, 0, 0);
    imagecolortransparent($brush, $brushtrans);

    for ($k = 1; $k < 18; ++$k) {
            $color = imagecolorallocate($brush, 255, $k * 15, 0);
            imagefilledellipse($brush, $k * 5, $k * 5, 5, 5, $color);
    }

    imagepng($brush);
    imagedestroy($brush);
The next step is to create a larger image, recreate that brush, and use it as the outline for a shape. Here's the code:
    $pic = imagecreatetruecolor(600,600);
    $brush = imagecreate(100,100);

    $brushtrans = imagecolorallocate($brush, 0, 0, 0);
    imagecolortransparent($brush, $brushtrans);

    for ($k = 1; $k < 18; ++$k) {
            $color = imagecolorallocate($brush, 255, $k * 15, 0);
            imagefilledellipse($brush, $k * 5, $k * 5, 5, 5, $color);
    }

    imagesetbrush($pic, $brush);
    imageellipse($pic, 300, 300, 350, 350, IMG_COLOR_BRUSHED);

    imagepng($pic);
    imagedestroy($pic);
    imagedestroy($brush);
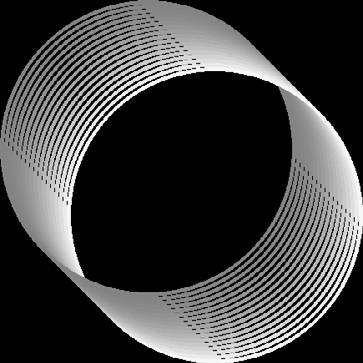
The new line in there is the call to imagesetbrush( )note that it takes the image you're changing as the first parameter, and the brush to use as the second. To actually use the brush that has been set, we need to pass the special constant IMG_COLOR_BRUSHED as the color parameter for our shape. That's pretty much it. The only other thing is the call to imagecolortransparent( ), which is there so that the black part of the brush (most of it!) doesn't overlay itself. The result of that script is shown Figure 16-15not bad for such a simple script, particularly as only one ellipse is actually drawn in the code. Figure 16-15. Drawing an ellipse with our dots gives us a brightly colored Mobius strip
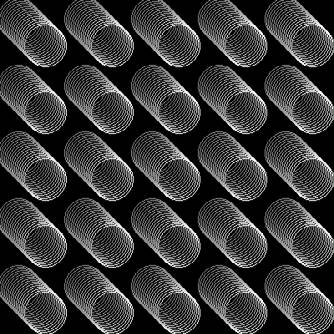
Once you've used your brush, you can change it for something else, and do so as many times as you want. Figure 16-16 shows the output of this next script, which uses ellipses drawn several times in different colors by re-creating the brush as necessary:
    $pic = imagecreatetruecolor(400,400);

    $bluecol = 0;

    for ($i = -10; $i < 410; $i += 80) {
            for ($j = -10; $j < 410; $j += 80) {
                    $brush = imagecreate(100,100);

                    $brushtrans = imagecolorallocate($brush, 0, 0, 0);
                    imagecolortransparent($brush, $brushtrans);

                    for ($k = 1; $k < 18; ++$k) {
                            $color = imagecolorallocate($brush, 255,
                                    $k * 15, $bluecol);
                            imagefilledellipse($brush, $k * 2, $k * 2,
                                    1, 1, $color);
                    }

                    imagesetbrush($pic, $brush);
                    imageellipse($pic, $i, $j, 50, 50, IMG_COLOR_BRUSHED);

                    imagedestroy($brush);
            }

            $bluecol += 40;
    }

    imagepng($pic);
    imagedestroy($pic);
Figure 16-16. Many dots, many ellipses, and many colors: iteration in action
|