Hack 1. Install PHP
Install the PHP language on Windows, Mac OS X, and Linux, and for both Apache and Internet Information Server. Installing PHP is the first step in using this book, and on most operating systems, it's a very easy thing to do. PHP installation starts with going to the PHP web site (http://www.php.net/) and downloading either the source code or the binaries, along with documentation. 1.2.1. Installing PHP on WindowsOn Windows, you need to start your PHP installation by downloading the PHP binaries for PHP Version 5. Use the .msi installer to make it easy on yourself, and specify the installation directory as c:\php5. With your PHP installation in place, you can run the PHP interpreter from a Windows DOS prompt: C:\> php -v PHP 5.0.4 (cli) (built: Mar 31 2005 02:45:00) Copyright If the php executable is not found, you need to add c:\php5\bin to your path. Use the Advanced tab of the system control panel, and click on the Environment Variables button. From there, edit the Path variable, adding c:\php5\bin to whatever path you already have in place.
Command-line access to PHP is great, but you really want to have PHP installed in and integrated with your web server. On Windows, you have two options for this integration. The first is to install the Apache Web Server and configure it for PHP; the second is to install the Internet Information Services (IIS) web server and to install PHP into that environment. In either case, you need to copy the php.ini file to your Windows directory, c:\windows. Edit the c:\windows\php.ini file and change the extension_dir line to read as follows: extension_dir = "c:\php5\ext" Further, uncomment lines such as this one: extension=php_mysql.dll This line enables access to the MySQL database.
Now go back to the PHP site (http://www.php.net/) and download the collection of PECL modules. Save these DLL files into the c:\php5\ext directory (the same directory you just referenced in php.ini). These extensions are required if you want access to SQL databases or if you want to use graphics functions (you will want to use both of these at some point). 1.2.1.1. Installing PHP in Apache.Go to the Apache web site (http://www.apache.org/) and download Version 1.3 of Apache, which is precompiled for Windows. This comes as an MSI installer, and that's the easiest way to install Apache. Once you've got Apache installed, the next step is to fix the http.conf file in the Apache conf directory (c:\Program Files\Apache Group\Apache\conf if you installed Apache in the default location). Add the following lines to the end of the httpd.conf file: LoadModule php5_module "c:/php5/php5apache.dll" AddModule mod_php5.c AddType application/x-httpd-php .php AddType application/x-httpd-php-source .phps Next, start the Apache server by running apache.exe: C:\Program Files\Apache Group\Apache> apache Apache/1.3.33 (Win32) PHP/5.0.4 running… The documents directory for this installation is htdocs (making the complete path c:\Program Files\Apache Group\Apache\htdocs). To test it, create a test.php file in the htdocs directory and put this code in the file: <?php phpinfo(); ?> Use your web browser to surf to the page; you should see something like Figure 1-1. From here, you can use the code from all of the hacks in this book. 1.2.1.2. Installing PHP in IIS.After installing PHP to the c:\php5 directory, you can integrate PHP into IIS through php5isapi.dll. Start by launching the IIS control panel. Then create a new virtual directory as shown in Figure 1-2. Make sure to set the Execute permission correctly (detailed in Figure 1-3). Next, right-click on the virtual directory and select Properties. Then, in the Properties dialog, click on the Configuration button. This will bring up the Application Mappings dialog, where you can associate the .php extension with php5isapi.dll. This dialog is shown in Figure 1-4. Click on the Add button to create a new mapping, and set the executable to c:\php5\php5isapi.dll.
Set the extension to .php. The result should look like Figure 1-5. Click OK (and confirm all the dialogs on the way out). Then navigate to the documents directory that you specified when you created the virtual directory. Create a new file called test.php with these contents: <?php phpinfo(); ?> Figure 1-1. The PHP test page on an Apache/Windows install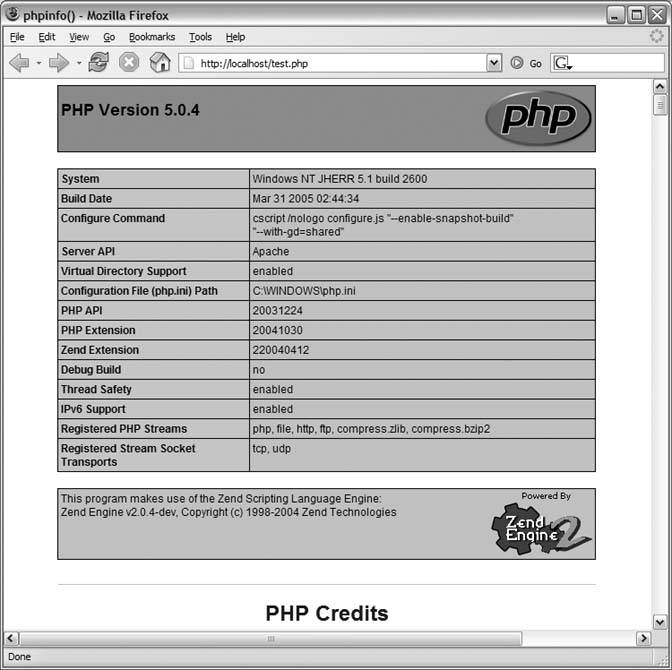
Figure 1-2. Creating a virtual directory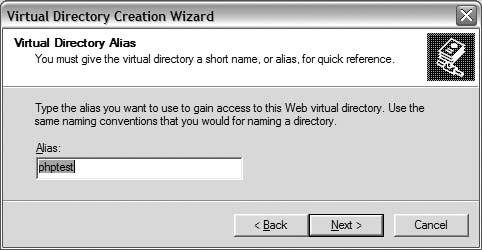
Figure 1-3. Setting the Execute permission of the virtual directory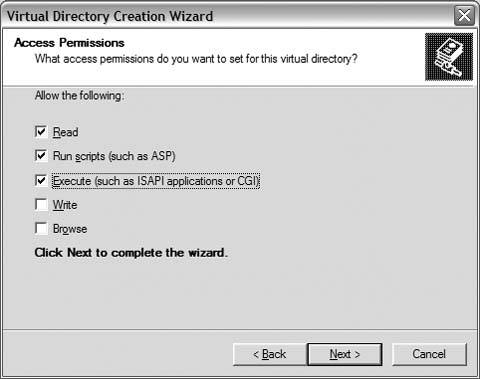
Figure 1-4. The Application Mappings dialog to set the .php file mapping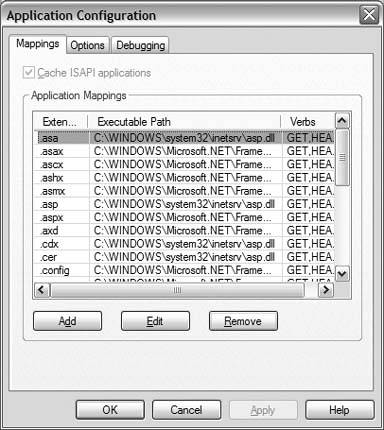
Then, navigate your browser to that file on localhost; you should see something like Figure 1-1. Figure 1-5. The mapping settings for PHP 5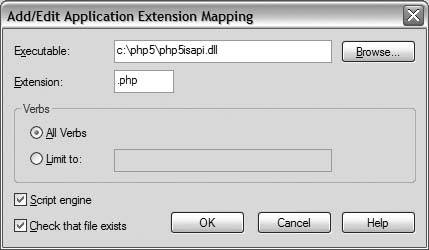
1.2.2. Installing PHP on Mac OS XPHP is preinstalled on all versions of OS X. All you need to do is enable it. That process starts with becoming the super user using the sudo command: % sudo tcsh In the super-user shell, you can modify system files. The next step is to edit the httpd.conf file in /etc/httpd using your text editor of choice (vi, emacs, etc.). Find and uncomment this line: LoadModule php4_module libexec/httpd/libphp4.so In addition, uncomment this line: AddModule mod_php4.c Then save the file and restart the built-in Apache server: % apachectl restart The default documents directory for the Apache Web Server on Mac OS X is /Library/WebServer/Documents. To test that PHP is responding correctly, create a test script in the documents directory: <?php phpinfo(); ?> Finally, surf to the test page so you can view the PHP status page (shown in Figure 1-6). However, all is not well; the preinstalled version of PHP on Mac OS X is Version 4, which has a very limited set of modules. Notably missing are any graphics modules! To get Version 5 of PHP, you can either download the source and then compile and install it or find a precompiled binary package. Figure 1-6. The test page on OS X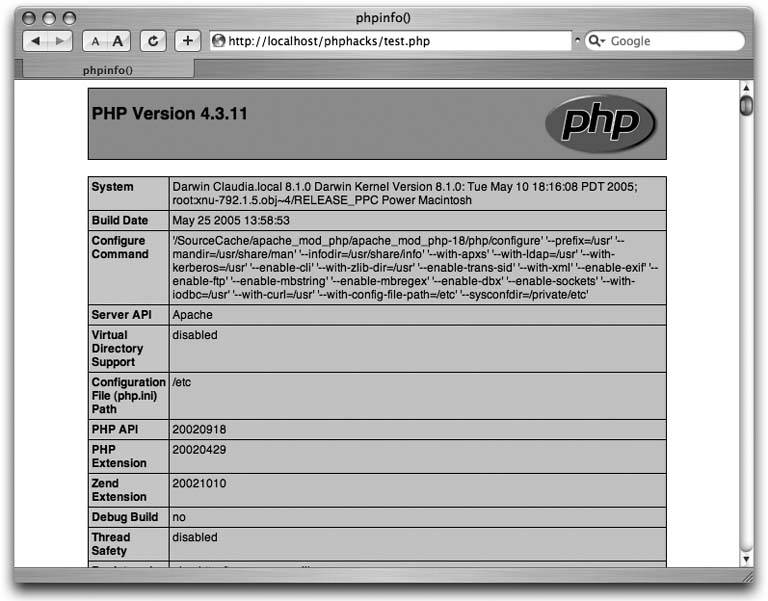
Marc Liyanage has an OS X binary package of PHP 5 with a bunch of nice libraries preinstalled on his web site (http://www.entropy.ch/software/macosx/php/). To install it, simply download the package installer and launch it (don't you love Mac OS X sometimes?). After installing the PHP 5 package, you will need to move the PHP 4 executables out of their default locations. Use these commands to move php and pear to php4 and pear4: % sudo mv /usr/bin/php /usr/bin/php4 % sudo mv /usr/bin/pear /usr/bin/pear4 Now request the version information from the PHP interpreter to ensure that you have Version 5 installed: % php -v PHP 5.0.4 (cli) (built: Apr 4 2005 17:32:28) Copyright (c) 1997-2004 The PHP Group Zend Engine v2.0.4-dev, Copyright (c) 1998-2004 Zend Technologies Verifying an Apache Web Server installation means going back to the test page we created earlier; Figure 1-7 shows the PHP page verifying that PHP 5 is running. Figure 1-7. The test page after installing PHP 5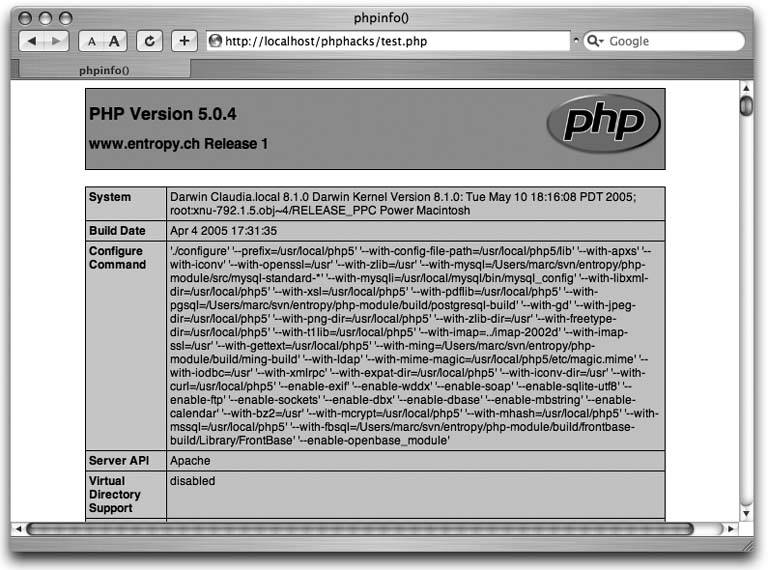
1.2.3. Installing PHP on LinuxThe process of installing PHP on Linux actually begins with determining whether PHP is already installed (in many cases, it is). First, you should check for the presence of the Apache Web Server on your installation. Is the machine serving pages? If not, check for the presence of the Apache httpd executable: my-host$ find / -name httpd If you find the Apache binary, make sure it's run as part of your machine's startup process. If Apache is not installed, installing the web server is your first step toward installing PHP. Go to the Apache web site (http://apache.org/) and download and install the server. Once Apache is installed, the next step is to check for an existing PHP installation. Create a file called index.php and place it in the Apache documents directory. The contents of the file should be: <?php phpinfo(); ?> Surf to the machine with your web browser and look at index.php. If you see something like Figure 1-7, you have a working PHP installation. If you see just the text of the index.php file, PHP is either not installed or not active. Check your Apache httpd.conf configuration file. If you see lines like this: # LoadModule php4_module libexec/httpd/libphp4.so enable those lines by removing the hash symbol at the start of the line. If the file contains no lines that are relevant to PHP, you will have to install PHP from source. Installing from source means downloading the source .tgz file from http://www.php.net/. Follow the installation instructions contained on the PHP site. You already have Linux running, so this should be a breeze.
With PHP installed, you should be able to navigate to the index.php page that you built earlier in this process and see output like Figure 1-7. 1.2.4. Checking Your ISP InstallationTo check the specifics of your ISP's PHP installation, you need to create a test page on your ISP server and surf your browser over to it. The contents of the test page should be: <?php phpinfo(); ?> With this file up on your server, you should be able to surf to it in your browser and see something like Figure 1-7. This will give you a complete listing of how the PHP interpreter was compiled, as well as what modules are installed. Two of the most common problems are lack of a database interface and lack of graphics tools. You should make sure that your ISP account has these installed. If you don't have these libraries installed, file a service ticket with your ISP to add these features (you shouldn't get much resistance; these are standard PHP libraries, useful to all PHP programmers). If you do not already have an ISP, make sure that any prospective ISPs have what you need installed before signing up. A small survey of hosting sites taken during the writing of this book indicated that most sites support both PHP 4 and PHP 5, but that many of them support PHP 5 as a CGI extension, which is slower than having it installed directly into the Apache Web Server. If PHP 5 is important to you, ensure that the site supports PHP 5 directly as an Apache plug-in, and not via CGI. 1.2.5. Installing MySQLPHP is just one part of what is called the LAMP architecture. LAMP stands for Linux, Apache, PHP (Python, Perl, or Ruby), and MySQL. The LAMP architecture is extremely popular because it's easy to install, easy to learn, very stable, and, best of all, free. Each piece of the LAMP puzzle contributes a major portion to the whole. Linux is the operating system upon which all the pieces run. Apache is the super-stable web server. PHP is the easy-to-use scripting language. And MySQL is where all of the data is stored. Because any reasonably complex web application will have some structured data storage requirements, most Unix ISPs offer Apache, PHP, and MySQL, which means that your code will not only be easy to develop, but also will run almost anywhere. Installing MySQL is very easy. Binary installers are available for Windows, Mac OS X, and some flavors of Linux; these are the easiest ways to get MySQL running quickly. Additionally, the source code compiles easily on all the Unix platforms. To build MySQL from source, first download the latest source code .tgz file from the official MySQL site (http://www.mysql.com/). Unpack that file and follow the instructions in the documentation on building the source and installing it. This will require super-user access, and access to the command line. 1.2.6. Managing the DatabasesOnce MySQL is installed, you will want to create a database to hold the tables for your web application. To create a new database, use the following command: % mysqladmin --user=root --password=password create dbname You will have to change the username and password to whatever is appropriate for your installation. dbname needs to change to whatever name you want for your database. Most of the hacks in this book create a database for use in the hack. These databases are given different names so that they don't overlap each other. Ideally, each PHP application should be using a different MySQL database. Removing a database is just as easy: % mysqladmin --user=root --password=password drop foo Dropping the database is potentially a very bad thing to do. Any data stored in the database will be destroyed. Do you really want to drop the 'foo' database [y/N] y Database "foo" dropped % In this case, I'm dropping the database named foo. By default, MySQL prompts to see whether you really want to drop the table. You can disable the prompt by adding the -f directive: % mysqladmin --user=root --password=password drop -f foo Database "foo" dropped
After creating a database, the next step is to add tables and data to it. The easiest way to do that is simply to redirect the SQL file that has the database schema into the mysql client application. Here is an example: % mysqladmin --user=root --password=password create btest % mysql --user=root --password=passwordbtest < books.sql The first command creates a database named btest, and the second loads it up with the table definitions and data in books.sql.
If you don't like to use command lines, you can always manage the database through the phpMyAdmin (http://www.phpmyadmin.net) web application. This user-friendly application allows you to add and remove databases, create and alter tables, query data, and even insert and update data through the web interface. 1.2.7. See Also
|