Hack 26. Create the Google Maps Scrolling Effect
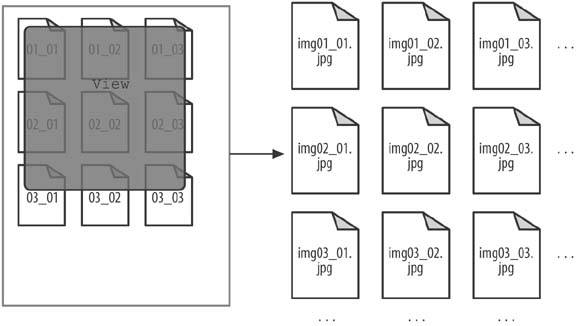
Use a combination of small images, PHP, and JavaScript to allow users to use their mouse to scroll around an image that is much larger than their screen. When Google Maps (http://maps.google.com/) was first introduced, the interactivity of the map blew people's socks off. On older mapping sites, you were presented with a map that had eight arrows positioned around it. When you clicked on an arrow, the page would be refreshed, and the map scrolled by one map unit in the direction you requested. Because of that page refresh, though, you had to reorient yourself to the new location. Google Maps changed all that. With Google Maps [Hack #95], you simply click on the map and then drag it in whichever direction you want to go. The page never refreshes (although it occasionally redraws), and you never lose track of where you were. I was so impressed with these maps that I decided to make my own version of the Google Maps code using PHP, some JavaScript, and the very large image created in "Split One Image into Multiple Images" [Hack #30]. Figure 3-23 shows the system's conceptual design. On the lefthand side of the illustration is the page, and on the righthand side is a set of images that contain the sliced-up larger image. The map moves within a view rectangle by repositioning the images within the view area. These images are drawn from the bank of images on the righthand side (all of the images are available instantly, without requiring a refresh). Figure 3-23. The image scroller design
3.17.1. The CodeThe code you want is shown in Example 3-21; save it as index.php. Example 3-21. Mimicking Google with a little PHP wizardry
<?php
$rows = 5;
$cols = 5;

$maxrows = 40;
$maxcols = 40;
$width = 100;
$height = 100;
?>
<html>
<head>
<script language="Javascript">
var origimgs = [];
<?php
for( $col = 0; $col < $maxcols; $col++ ) {
?>
origimgs[ <?php echo($col); ?> ] = [];
<?php
for( $row = 0; $row < $maxrows; $row++ ) {
  $id = sprintf( "img%02d_%02d", $row, $col );
?>
origimgs[ <?php echo($col); ?> ][ <?php echo($row); ?> ] = "<?php echo( $id )
	?>.jpg";
<?php
} }
?>

var imgs = [];

function startup()
{
<?php
for( $col = 0; $col < $cols + 2; $col++ ) {
?>
imgs[<?php echo($col) ?>] = [];
<?php
for( $row = 0; $row < $rows + 2; $row++ ) {
  $id = sprintf( "img%02d_%02d", $row, $col );
?>
imgs[<?php echo($col) ?>][<?php echo($row) ?>] = document.getElementById( "<?php
echo( $id ); ?>" );
<?php
} }
?>
  position(0,0);
}

var scrollrows = <?php echo( $rows ); ?>;
var scrollcols = <?php echo( $cols ); ?>;
var width = <?php echo( $width ); ?>;
var height = <?php echo( $height ); ?>;
var maxrows = <?php echo( $maxrows ); ?>;
var maxcols = <?php echo( $maxcols ); ?>;
var xpos = 0;
var ypos = 0;

document.onmousemove = function(e)
{
  if ( dragging )
  {

    xpos += e.pageX - dragx;
	ypos += e.pageY - dragy;

	if ( xpos < 0 )
      xpos = 0;
    if ( ypos < 0 )
      ypos = 0;

    position( xpos, ypos );

	dragx = e.pageX;
	dragy = e.pageY;
   }
}

document.onmousedown = function(e)
{
  dragging = true;
  dragx = e.pageX;
  dragy = e.pageY;
}

document.onmouseup = function(e)
{
  dragging = false;
}

function position( x, y )
{
  if ( x < 0 ) x = 0;
  if ( y < 0 ) y = 0;

  startcol = Math.floor( x / width );
  startrow = Math.floor( y / height );

  offsetx = Math.abs( x - ( startcol * width ) ) * -1;
  offsety = Math.abs( y - ( startrow * height ) ) * -1;

  viewheight = ( scrollrows + 1 ) * height;
  viewwidth = ( scrollcols + 1 ) * width;

  for( var row = 0; row < scrollrows + 2; row++)
  {
    for( var col = 0; col < scrollcols + 2; col++)
	{

	var left = offsetx + ( col * width );
	var top = offsety + ( row * height );
	imgs[row][col].style.left = left;
	imgs[row][col].style.top = top;
	imgs[row][col].src = origimgs[startrow+row][startcol+col];

	remainderx = viewwidth - ( left + width );
	remaindery = viewheight - ( top + height );

	if ( remainderx > width )
      remainderx = width;
    if ( remainderx < 0 )
      remainderx = 0;
    if ( remaindery > height )
      remaindery = height;
    if ( remaindery < 0 )
      remaindery = 0;

	imgs[row][col].style.clip = "rect( 0px 0px "+remaindery+"px
"+remainderx+"px )";
	}
  }
}

var dragging = false;
var dragx = 0;
var dragy = 0;

</script>
</head>
<body onload="startup();">
<?php
for( $row = 0; $row < $rows + 2; $row++ ) {
for( $col = 0; $col < $cols + 2; $col++ ) {
  $id = sprintf( "img%02d_%02d", $row, $col );
?>
<img src="" style="position:absolute;left:0;top:0;" id="<?php echo($id) ?>" />
<?php
} }
?>
</body>
</html>
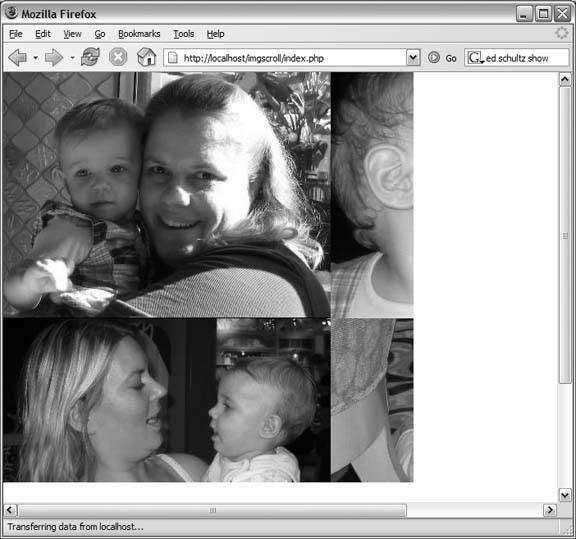
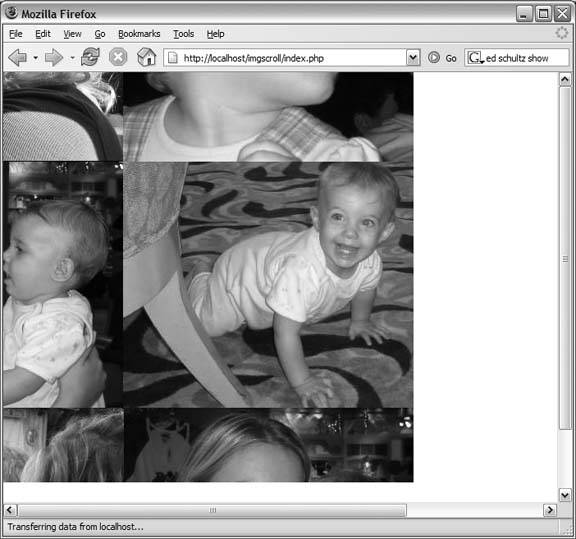
In the first portion of this script, a two-dimensional JavaScript array of images is set up. The system will use this array when scrolling around the landscape. Each image in the grid needs to be the same size; their width and height are defined by the width and height values at the start of the script. The rows and cols values define how big the viewport is, and the maxrows and maxcols values define how big the entire map is. The last thing the PHP code does is to set up the viewport images in the body section of the page. These all start out absolutely positioned in the upper-lefthand corner of the page. Once the page is rendered, the rest of the magic is left to the browser. The browser calls the startup() function in the onload event on the body tag. startup( ) also sets up the image array and calls the position( ) JavaScript function to update the map. The position( ) function is where the fun really takes place. It calculates which images are required to draw the map, sets the src attribute of the image tags to the correct files, positions the images on the page, and sets the clipping values on each image so that you always get a square. The onmousedown, onmousemove, and onmouseup functions are used to track the mouse as it's dragging across the page. These functions in turn call position( ) to redraw the map as the mouse moves. 3.17.2. Running the HackUpload the code and the source images to your PHP server, and browse to the index.php page. You should see something like Figure 3-24. From here, click on the image and drag down and to the right. The image should scroll seamlesslywithout a page refreshto a point roughly similar to what you see in Figure 3-25. Keep in mind that this isn't a single image that's being scrolled; it's a set of 1,600 smaller 100 x 100 images that are being swapped in and out of the document seamlessly. This is done using a 7 x 7 grid of image tags. These tags are positioned absolutely on the page with CSS. As the user scrolls around, the images are moved, and their clipping is adjusted. When the user exceeds the extent of the current images on the page, the image sources are updated with the required images. Figure 3-24. The starting position of the scroll plane
With an application like this, doing the work on the browser without a page refresh can be very cool and can result in a much better end-user experience. When pages refresh, the screen turns white, and then (slowly) updates with new content. This can be a very jarring experience, often causing a user to lose his frame of reference. If the page refresh can be avoided, the user will not experience this discontinuity of reference (and happy users make happy programmers, right?). 3.17.3. See Also
Figure 3-25. The image after having scrolled by dragging with the mouse
|